How to add custom fonts to your Squarespace website
Post Updated Dec. 2023. Note that Squarespace makes frequent updates and this tutorial could look different from what you see.
There are so many great fonts available on Squarespace(600+ Google Fonts and 1000+ Adobe Fonts to be exact!)
As a font-lover myself, I get it that sometimes you just meet “the one”, fall in love, and you just gotta have that font for your website.
So what do you do when it’s not available in Squarespace? Today’s post will walk you through the options!
Step One: Make triple sure that your font is not available in Squarespace!
Why? Adding fonts to your site will slow your site down a little bit, and you want to minimize that if possible.
So head over to your Site Styles panel and search for your desired font by name before doing anything else.
HINT: Find your Site Styles panel by clicking the little paintbrush icon!
Step Two: Check your font license!
Make sure you’ve read and followed the licensing info for your font correctly. You can get into costly legal trouble for using a custom font without the appropriate license.
There are many different license types, so please make sure you don’t skip this step. And, don’t be afraid to ask questions to the foundry or licensor if you don’t understand, because you are the one ultimately liable.
Note that some of these “free” fonts you can get online are only free for personal use, not for business. OR they require that you include attribution on your website for the font. So please read the fine print!
Ok, now onto the fun part!
Step Three: Install your font!
First, get your font file ready.
You may have been given a “zip file”, so you want to open that up first. Inside there should be at least one of the following file types (these are the most common, and any of these will work just fine in Squarespace):
.woff or .woff2
.ttf
.otf
Second, add your file to Squarespace.
Go to Main Menu -> Website -> Scroll all the way down -> Website Tools -> Custom CSS
You can also use the little magnifying glass and start typing CSS and it will bring you to the panel:
Once you’re in your CSS panel, click on the “Custom Files” dropdown (on the left below where it says “open in new window”). It will prompt you to choose the file from your computer.
Then, pat yourself on the back, you’re partway there!
Third, add your code (there are two parts to this)
Part One: Copy and paste this code into the CSS Panel (that blank white space below where you just put your font file):
@font-face {

  font-family: 'name of your font';
  src: url('yourfontfilegoeshere') format('filetype');

    }
Part Two: Add your custom font file to the code
This is where you want to pay close attention to detail! In code, colons, semicolons, quotation marks, etc. all mean something, so you want to make sure not to delete any punctuation that is there.
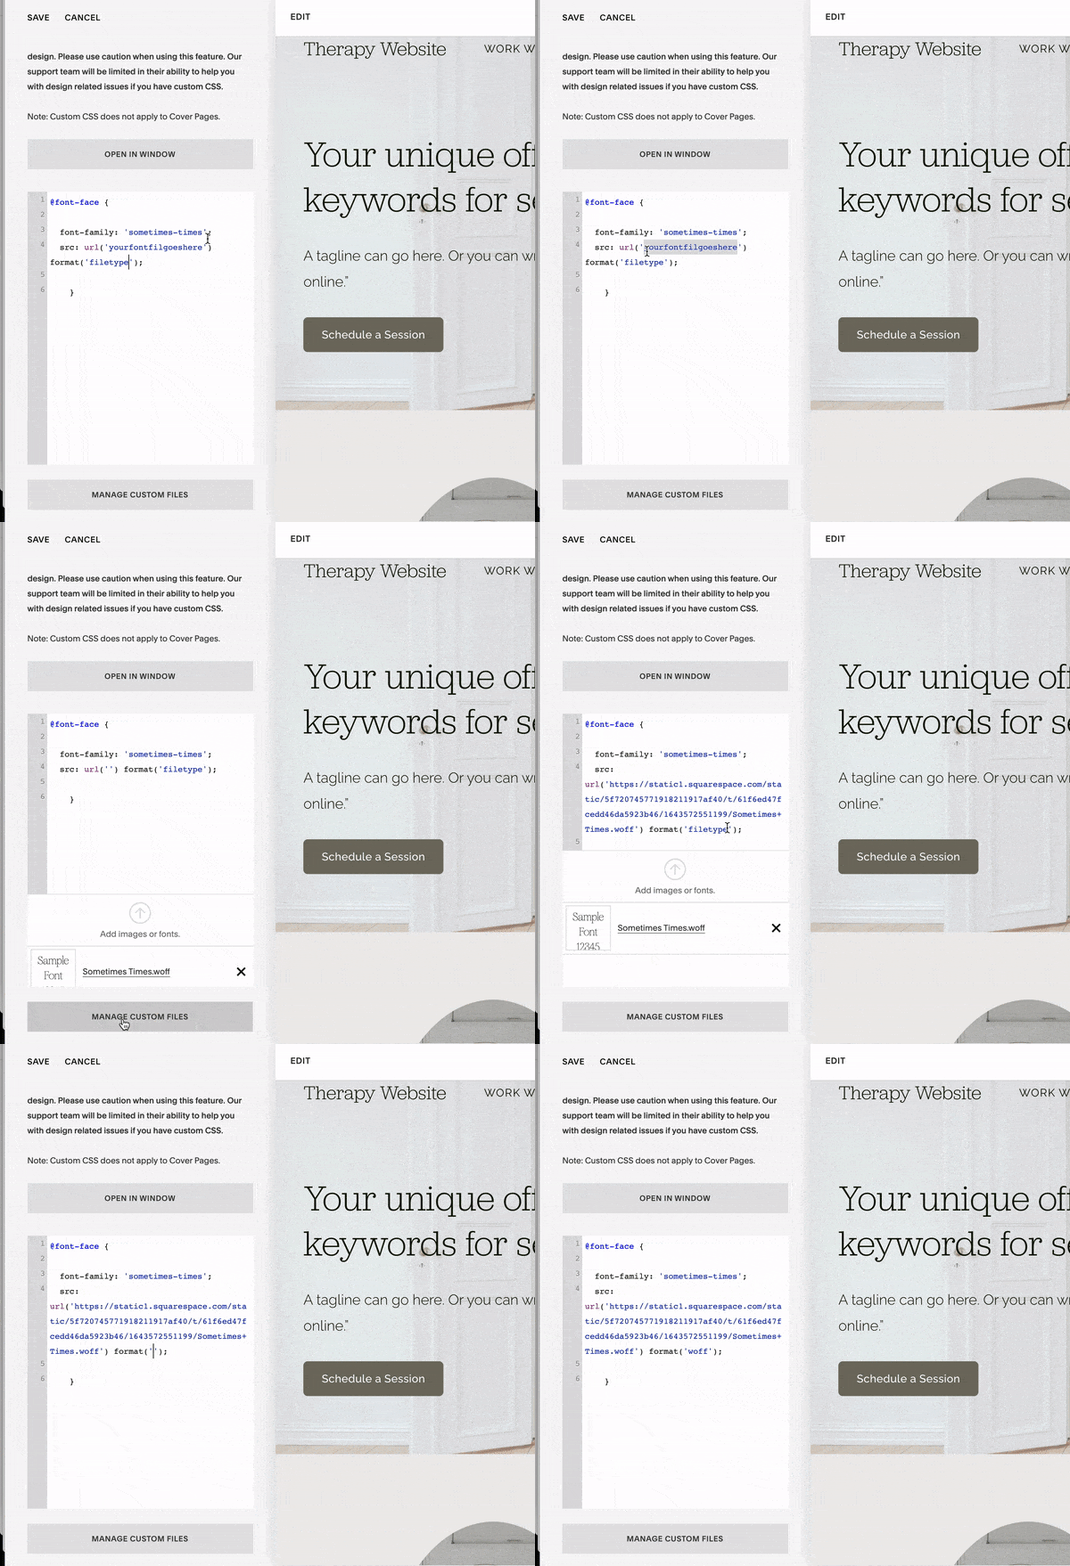
When you add your font file in, you will delete what I’ve written above that says ‘yourfontfilegoeshere’ and replace that with your actual file–just make sure to insert your file in-between the quotation marks!
Here’s a demo:
NOTE: this is an older version of the CSS panel but the process is the same.
Also shown in the clip above is the other part of this step.
Change the ‘format’ where it says ‘filetype’ to the actual file type, such as:
.ttf = format('truetype');
.otf = format('opentype')
.woff = format('woff')
.woff2 = format('woff2')
Again, make sure you enter the file type between the quotation marks! Also, note that ‘woff’ doesn’t have a period before it. Here are all the different file types in the correct syntax for you:
So, you might note that nothing is happening yet 🧐
That’s because we need to…..
Do The Fourth and Final Thing: Declare how you want your font to be used!
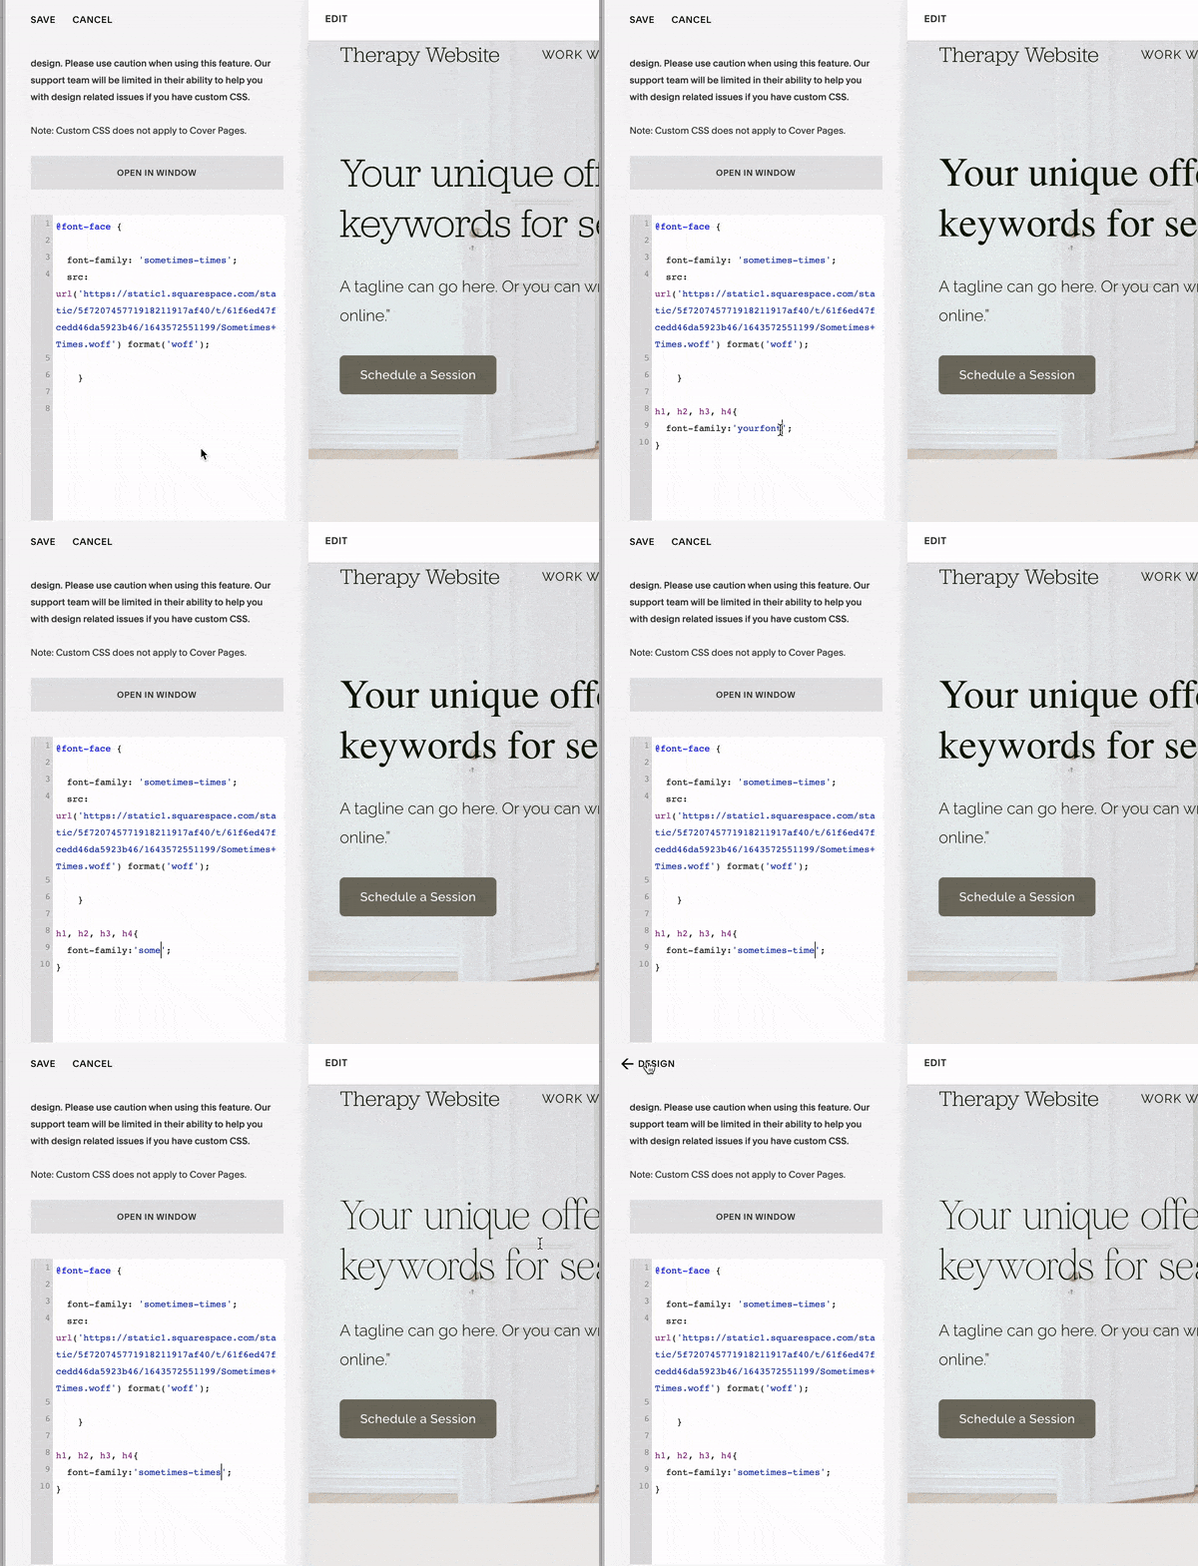
This means adding one more piece of code. If, for example, you want your code to work for all your headings, here’s what that code looks like:
h1, h2, h3, h4{

  font-family:'yourfont';

}
And here’s an example of what it looks like in action (add the code in the correct spot, see the font change!)
Step Four: Enjoy your beautiful new font!
I hope this is a helpful tutorial for customizing your Squarespace site. The idea for this post actually came from a question I got from someone who downloaded my free template, so if you have questions, feel free to let us know and we may be able to write a post about it!
And, if you haven’t, check out our Free Squarespace Template for Therapists! It’s chock full of tips about how to organize your site and what to write on every page.


